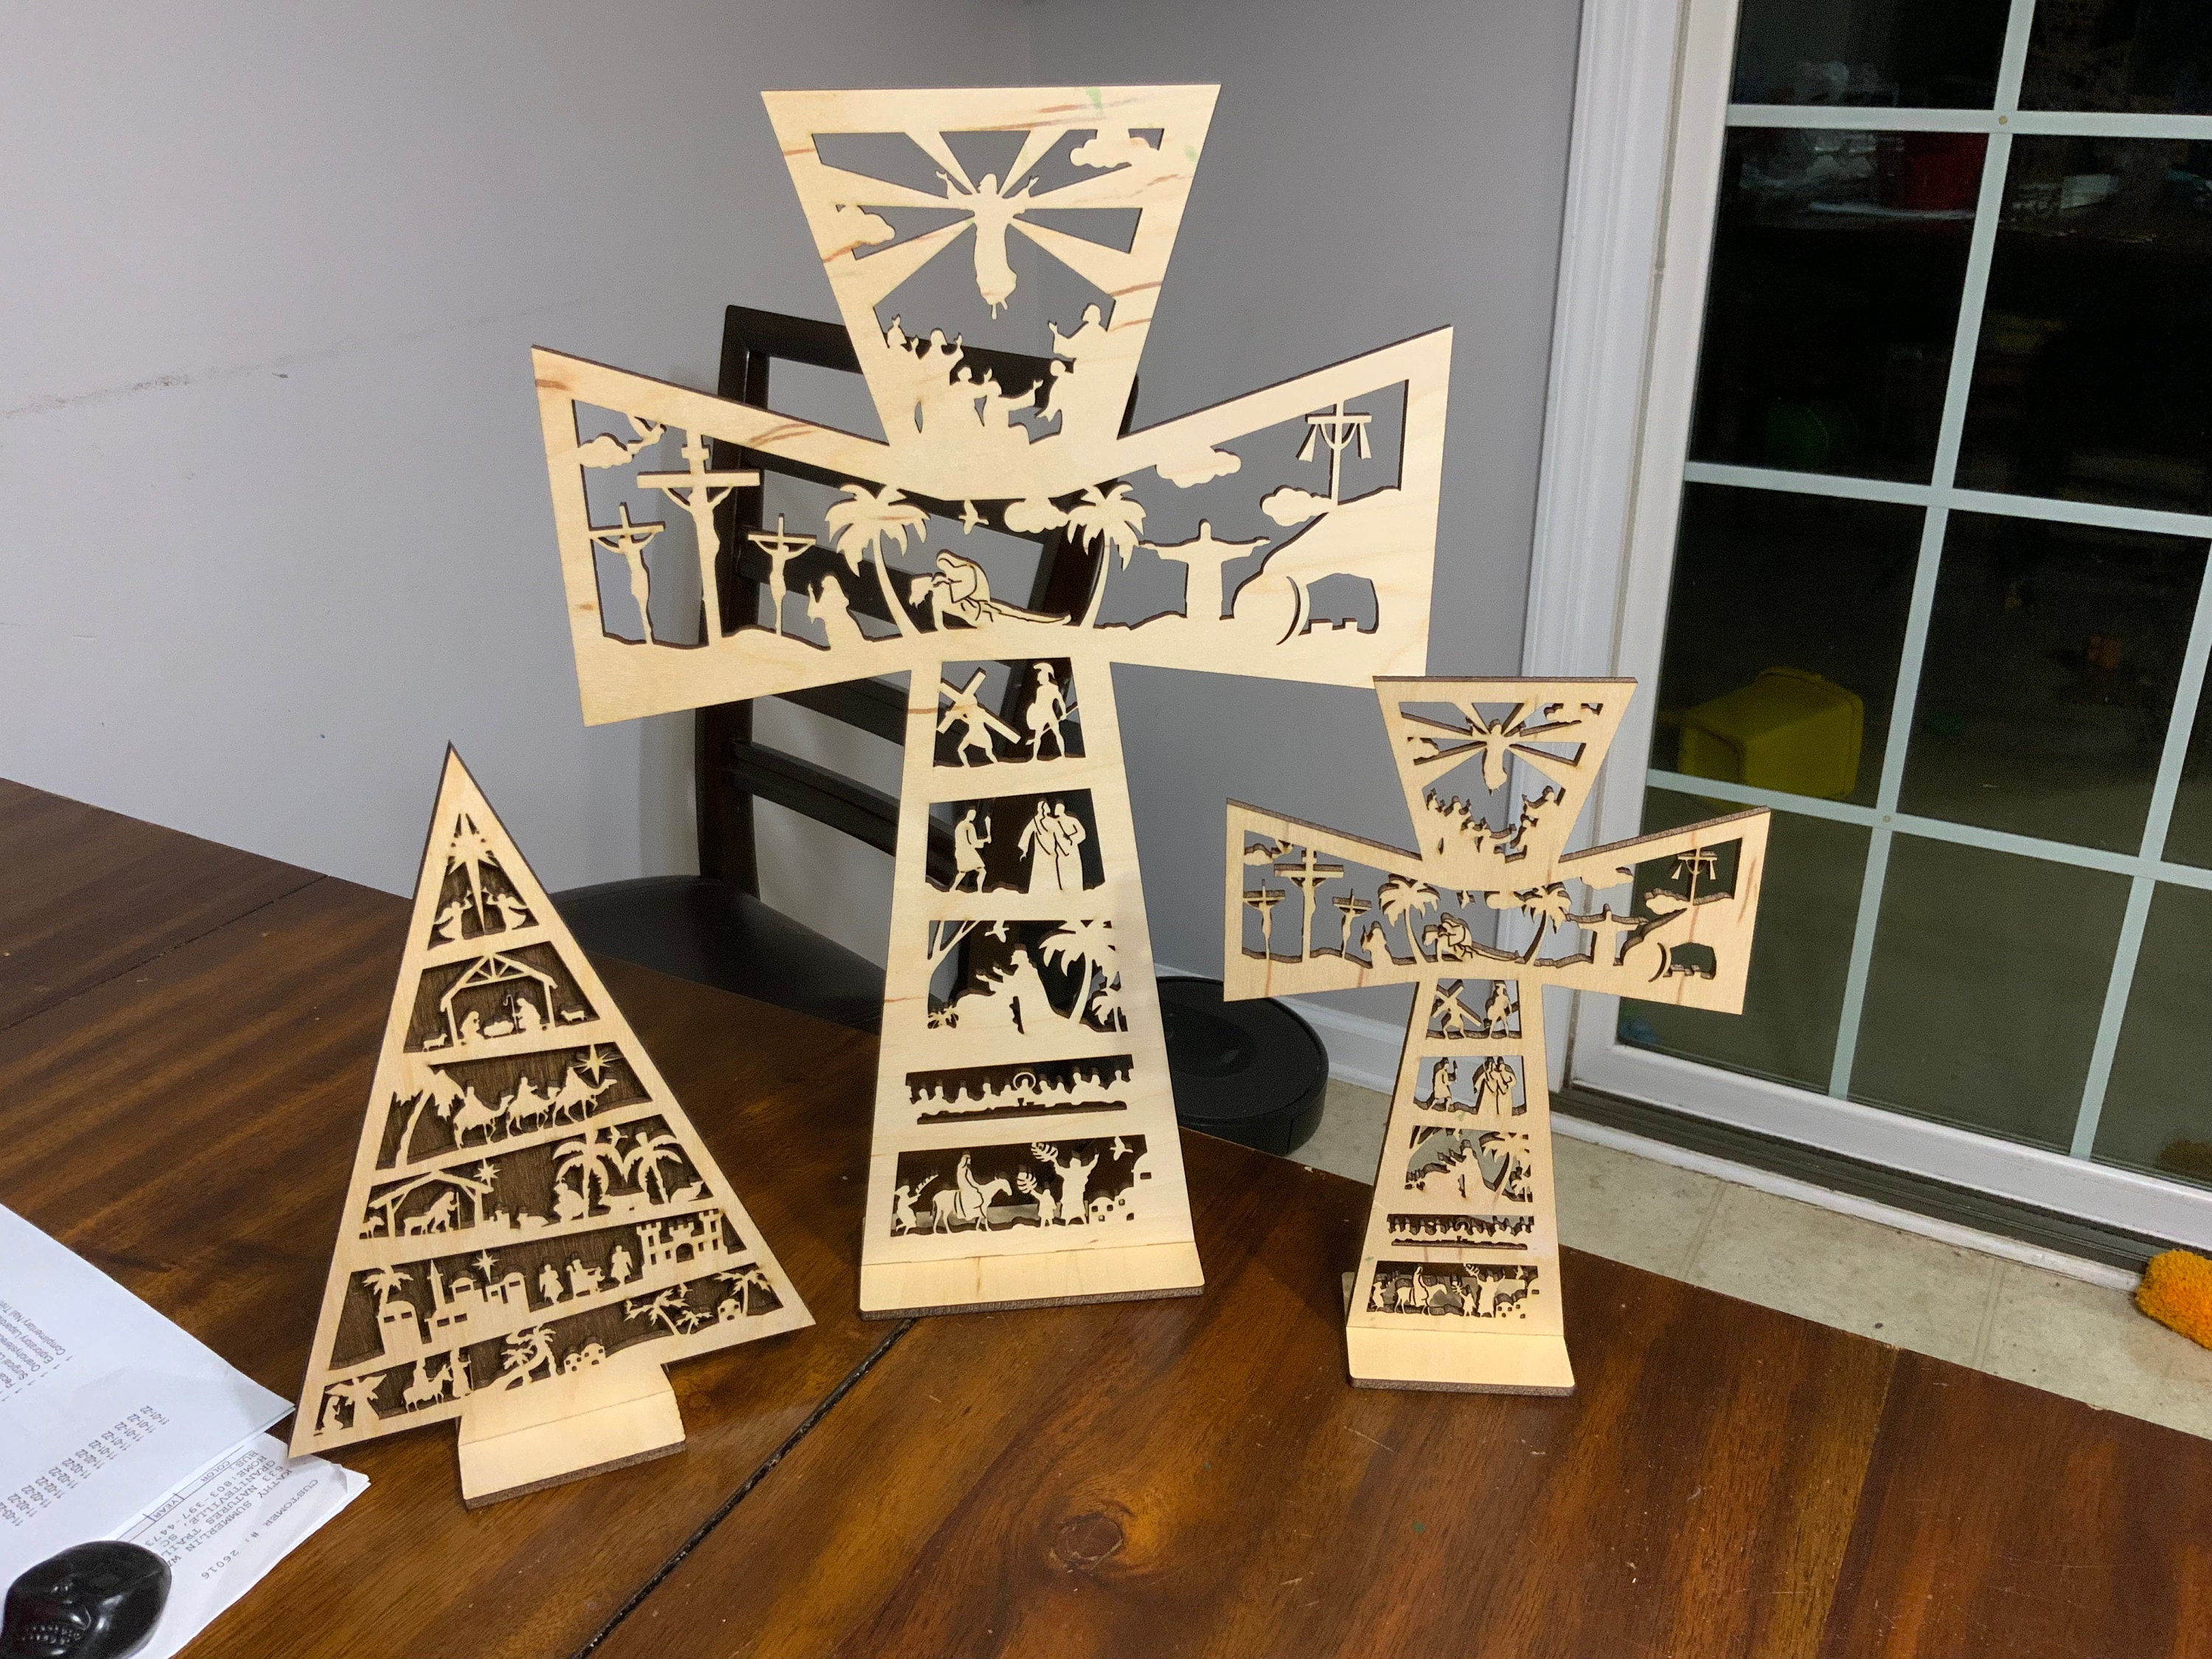
I am so excited to share my new design for my Story of Easter Cross!
As soon as I listed the Nativity Trees (found here), I knew that I needed to design something to tell the story of Easter. In my mind I was picturing a cross with all the scenes from Palm Sunday through to the ascension of Jesus Christ.
So, I got to work researching the Story of Easter so that I could make sure I was designing the scenes correctly. Once I knew what scenes I wanted to include, I got down to the actual drawing and designing.
But first, I had to decide on the shape of the cross. It needed to be something that would look just as good at the small 9" size as the large 15" size. It also needed to pair well with the Nativity Trees becasue I plan on offering them as a bundle. So, I played around with a few different styles of crosses, but ultimately I decided something that had clean lines like the Nativity Tree was the way to go.
Once I had my shape, I started dividing the cross into different areas for the various scenes. I had 8 scenes I wanted to include:
- Palm Sunday
- Last Supper
- Judas betraying Jesus by kissing his cheek
- Jesus carrying the cross
- The Crucifixion of Jesus with Mary praying the feet of the crosses
- Mary holding Jesus after he was removed from the cross
- Jesus risen from the empty tomb
- Ascension of Jesus Christ
Once I had all the areas for the scenes laid out, I started drawing each scene. This took forever! I knew I wanted to be able to offer the Easter Cross in the same 3 sizes as the Nativity Tree, so I had to make sure the detail I included wasn't too much for the 9" size, but at the same time it had to be enough to not look odd at the 15" size.
I spent WEEKS, drawing the scenes! I would get frustrated and take a break (that often lasted days or weeks) while I played around with the design in my head.
But...eventually I had something I thought was really good. I wasn't 100% in love with it, but I liked it enough to finally do a test "print" of the small, 9" cross.
The first attempt went surprisingly well! I did realize that the design would need some tweaks. But nothing major! Just a little bit of thickening up of some thin areas (like the donkey tail, a few arms/legs, the sword, Jesus' halo, etc) and some thinning out of the inside lines on the bodies with them. (Sorry your head fell off, Mary!)
After a few tweaks in the needed areas, I was ready to "print" again. This time it was only the pesky soldier's sword that needed to be slightly modified for the small scale. A quick tweak, "reprint", and...BEAUTIFUL!
I was absolutely, 100% in love with how it came out! But the true test was going to be if the design still looked as good at the large, 15" size.
IT DOES!
I cannot wait to get all 3 sizes cut, assembled, and photographed in the different color options! In fact, I am so impatient to share these with everyone that I might just list them with only the photos of the natural tan color fronts and dark walnut backs!
Please let me know what you think of the design in the comments!
-Michelle Deer

